Building my personal website with Next.js backed by Notion
When deciding to build a website in 2021 there's a bit of a double edged sword, the choices are really endless, with new frameworks and tools getting released almost daily. For this website I wanted to try out Next.js, a javascript framework built on React that handles all the hard parts about server side rendering & configs. (If you've ever debugged webpack configs you'll appreciate not having to worry about that stuff anymore).
The reason I chose Next.js is how easily you can create really performant websites. With getStaticProps you can build super fast completely static pages which can also update periodically without needing to rebuild your whole site. In getStaticProps you can call any type of api or fetch data from the filesystem (like this blog), and then forward the data as props to your component. getStaticProps is run at build-time so the visitors will always get served a fast static page.
export async function getStaticProps(context) {
  return {
    props: {}, // will be passed to the page component as props
    // Next.js will attempt to re-generate the page:
    // - When a request comes in
    // - At most once every second
    revalidate: 1, // In seconds
  }
}
My initial idea for this website was to have four sections:
- Portfolio
- About me
- Blog
- Book reviews
I knew I wanted to build the blog based on MDX and the Next.js team have a really good example repo settings this up so I won't go through that part in further detail.
Fetching data from Notion
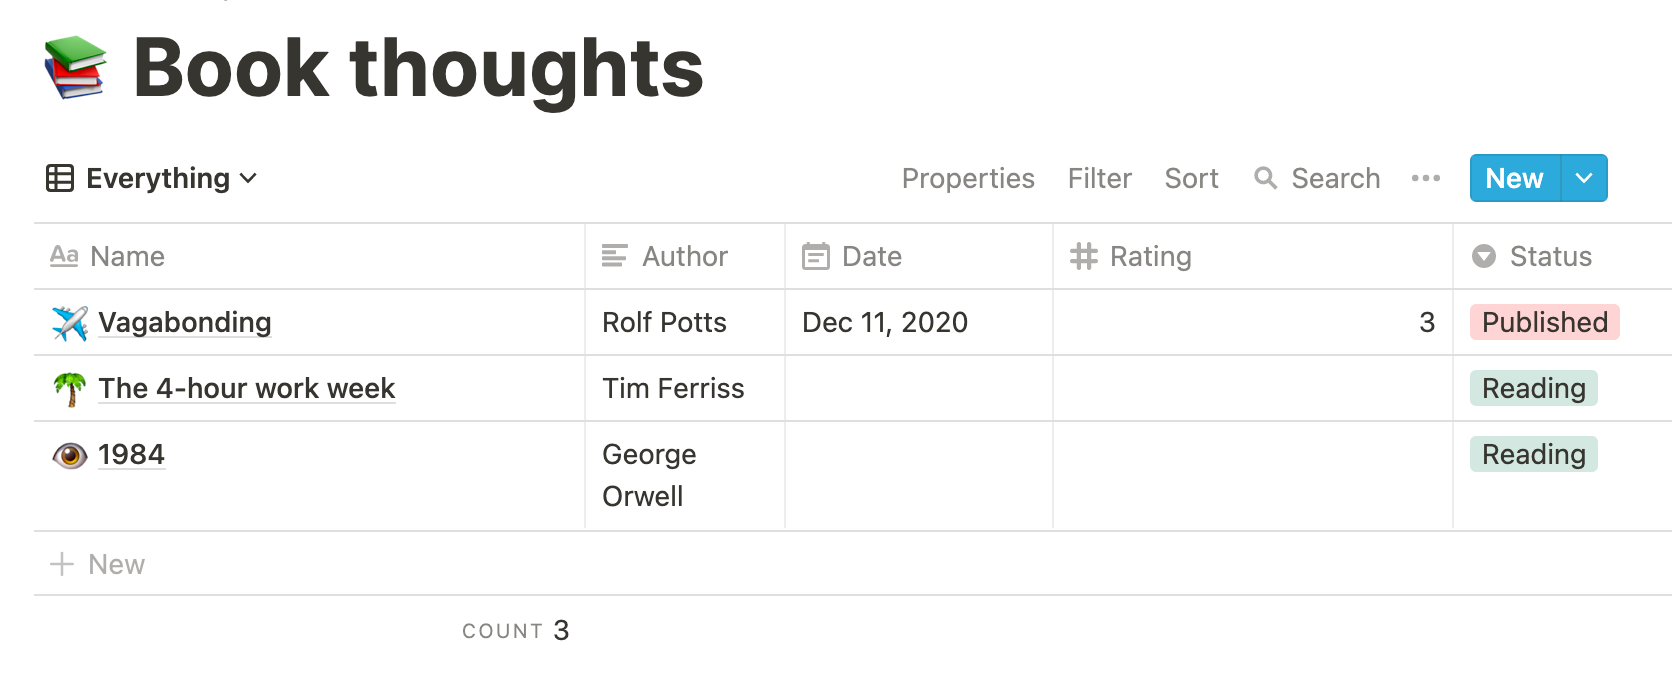
Last year I started using Notion and I've grown very fond of it. It's now pretty much my second brain, containing everything from work related things to personal health goals. I read a lot of books which I've just started reviewing and add thoughts to in Notion. It's setup as a simple table containing some pages with reviews. Why not share this on my website?

Notion doesn't have a public api (yet), but we can use an unofficial wrapper called notion-api-worker or roll your own thing like Guillermo Rauch does here.
You can host the api yourself or use the hosted one provided by splitbee like we'll be doing in the example below. Loading our list of books is as simple as creating a new file inside our pages folder, adding getStaticProps and calling the id of our table.
export async function getStaticProps() {
  const books = await fetch('https://notion-api.splitbee.io/v1/table/<NOTION_TABLE_ID>').then(res => res.json())

  return {
    props: {
      books,
    },
  }
}
Note: Using their hosted api will only work on published notion pages. Publishing your page on notion will obviously make it public to everyone. If you're not ok with keeping non-finished stuff public you can access private pages by adding your NOTION_TOKEN as described here
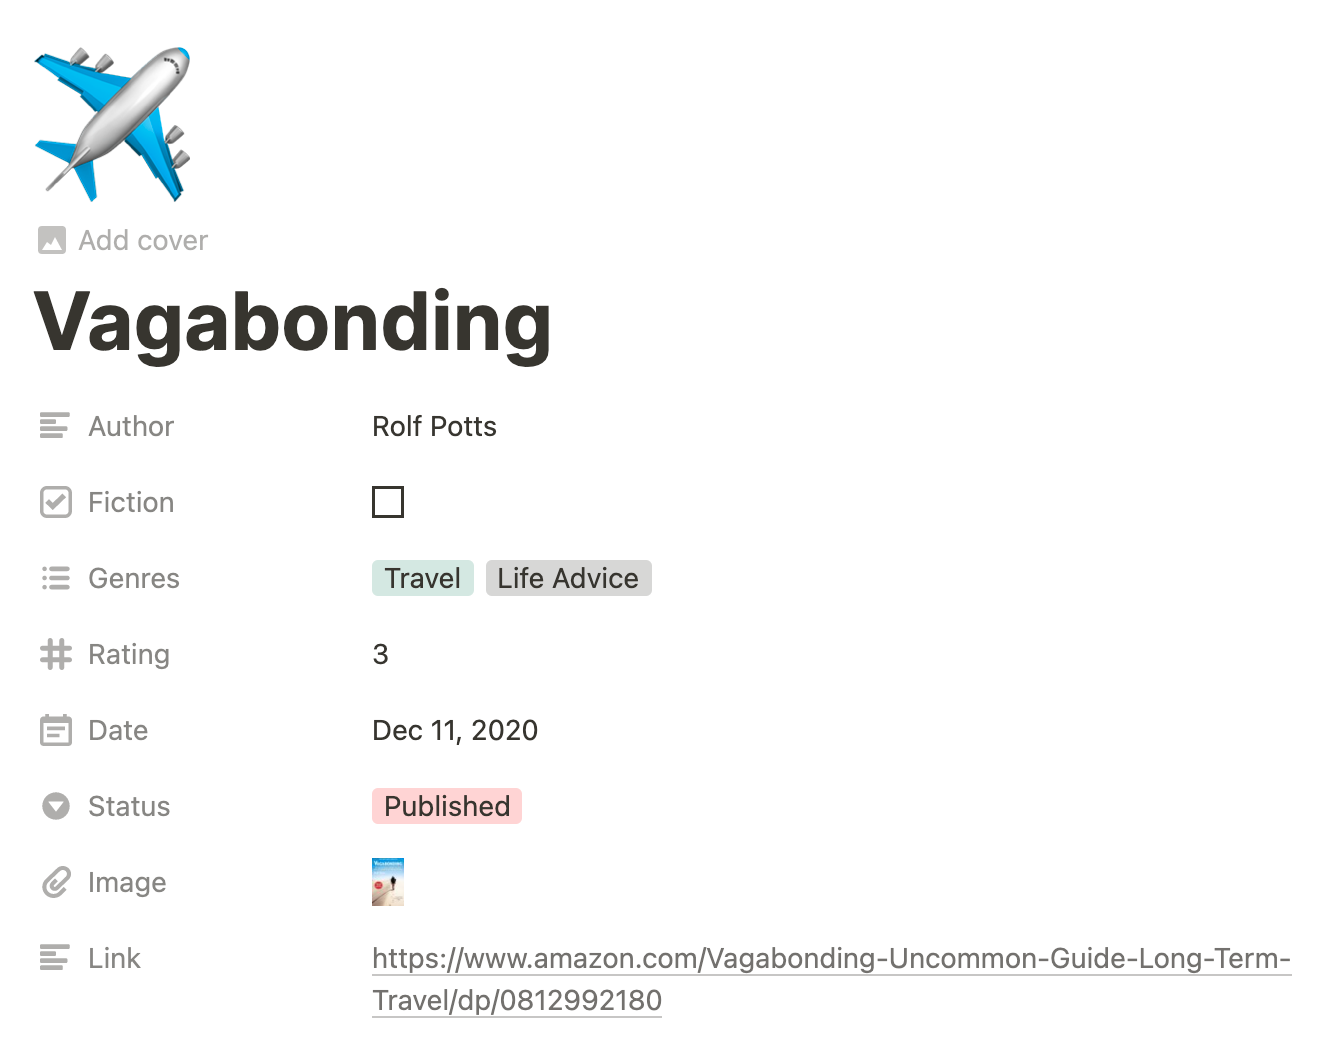
Our books prop will contain a list of items containing all properties of your subpages. In my example I have a few properties like author, rating, date finished, genres etc.

Which maps to these types:
export type Book = {
    Author: string
    Date: string
    Fiction: boolean
    Genres: Array<string>
    Name: string
    Rating: number
    Published: boolean
    Image: Array<{
        name: string
        rawUrl: string
        url: string
    }>
    Link: string
    id: string
}
To render our list of books we'll map over all the books and add some styling:
import Link from 'next/link'
import Image from 'next/image'
import Rating from 'components/rating'
import slugifiy from 'slugify'
import styles from './books.module.scss'

<ul className={styles.grid}>
    {books.map(({ Name: title, Author: author, Rating: rating, Image: image, id }) => {
        const slug = slugifiy(title, { lower: true })
            return (
                <li className={styles.book} key={id}>
                    <Link href={books/${slug}}>
                        <a>
                            <Image src={image[0].url} width={218} height={328} className={styles.cover} />
                            <strong className={styles.title}>{title}</strong>
                            <p className={styles.author}>{author}</p>
                            <Rating rating={rating} />
                        </a>
                    </Link>
                </li>
            )
    })}
</ul>
We can use Next/Image in order to automatically render an optimised image. When building our specific book pages which will show our reviews and notes I'd like to have pretty slugs instead of using the notion id directly. We can do this either by adding a slug property directly in notion, or use a package like slugify to generate one for us.
For building our book pages we'll use Next.js dynamic routes. We can do this by matching our folder stucture to our url structure. For this example we'll create a "book" folder inside "pages" and create a new file called [slug].js.
pages/book/[slug].js → /boom/:slug (/book/vagabonding)
Inside [slug].js we need to specify exactly which slugs we have. We do this with the function getStaticPaths. We'll fetch our books table like before, mapping over the values to create list of possible paths including our custom slugs.
export const getStaticPaths: GetStaticPaths = async () => {
    const bookRes = await fetch(https://notion-api.splitbee.io/v1/table/[NOTION_TABLE_ID])
    const bookData = await bookRes.json()
    const paths = bookData.map(b => /books/${slugify(b.Name, { lower: true })})
    return {
        paths,
        fallback: false,
    }
}
Moving on to getStaticProps we need to get our list of books again, in order to find out the notion page id for our specific slug. We can get our current page slug from context, which is the first parameter of the function. We'll use it to find the specific book from our list and then fetch that books details by it's id
export const getStaticProps: GetStaticProps = async context => {
    const bookRes = await fetch(https://notion-api.splitbee.io/v1/table/[NOTION_TABLE_ID])
    const bookData = await bookRes.json()

    if (!bookData) {
        return {
            notFound: true,
        }
    }

    const { slug } = context.params
    const book = bookData.find(b => slugify(b.name, { lower: true }) === slug)

    const pageRes = await fetch(`https://notion-api.splitbee.io/v1/page/${book.id}
    const pageData = await pageRes.json()

      return {
        props: {
          book,
          page: pageData,
        },
        revalidate: 1,
      }
    }
The pageData variable contains json which you can render however you want, or you can simply use the react-notion package created by the same authors as notion-api-worker.
import 'react-notion/src/styles.css'
import { NotionRenderer } from 'react-notion'

export default ({ pageData }) => (
  <div style={{ maxWidth: 768 }}>
    <NotionRenderer blockMap={pageData} />
  </div>
)
This will in turn render your content pretty much exactly like it appears in Notion. What's really great is that thanks to Next.js static rendering this page will be much faster than notion itself 😅
If you want to tweak the styling simply wrap NotionRenderer in a div and apply any custom styling. On my website I'm using this to tweak a few font-sizes and font-weights and set the text color to a custom variable so my site works in dark mode.
.post {
    h1,
    h2,
    h3,
    h4,
    h5,
    h6,
    p,
    ul,
    li,
    ol {
        color: var(--text);
}
That's it, check out an example of this on /books and /books/vagabonding or the source code available on GitHub.
✌️


