Segmented Control for web with Framer Motion
Despite its funny name, If you’ve ever used an iOS device you’ll recognise the UISegmentedControl:
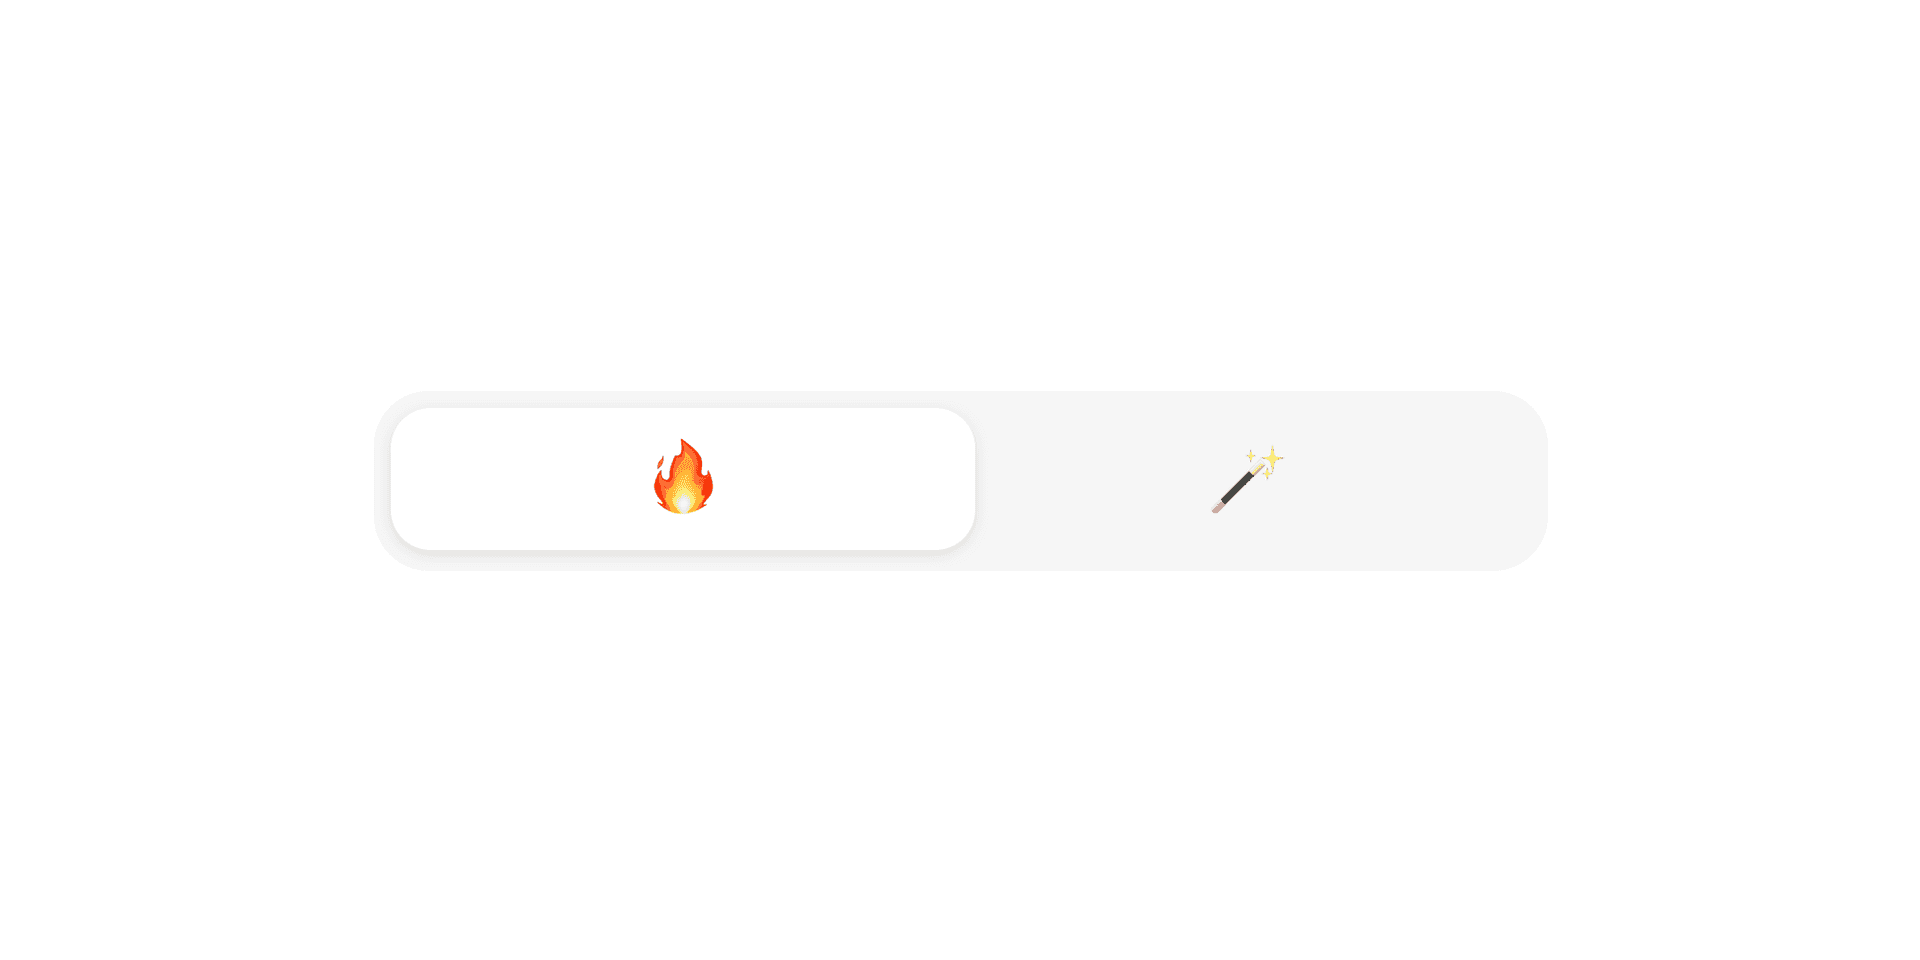
In this post I’ll show how to recreate it for web using React and Framer Motion resulting in this (try it out by clicking below!):
Our stack
I’m using a Next.js/React/Typescript/SASS/CSS Modules stack but any react project works fine, as we are use Framer Motion for the animations.
Our finished component
import { useState } from "react";
import { motion, AnimateSharedLayout } from "framer-motion";
import styles from "./segmentedcontrol.module.scss";

type SegmentedControlProps = {
  items: Array<string>;
};

const SegmentedControl = ({ items }: SegmentedControlProps): JSX.Element => {
  const [activeItem, setActiveitem] = useState(0);
  return (
    <AnimateSharedLayout>
      <ol className={styles.list}>
        {items.map((item, i) => {
          const isActive = i === activeItem;
          return (
            <motion.li
              className={
                isActive || i === activeItem - 1
                  ? styles.itemNoDivider
                  : styles.item
              }
              whileTap={isActive ? { scale: 0.95 } : { opacity: 0.6 }}
              key={item}
            >
              <button
                onClick={() => setActiveitem(i)}
                type="button"
                className={styles.button}
              >
                {isActive && (
                  <motion.div
                    layoutId="SegmentedControlActive"
                    className={styles.active}
                  />
                )}
                <span className={styles.label}>{item}</span>
              </button>
            </motion.li>
          );
        })}
      </ol>
    </AnimateSharedLayout>
  );
};

export default SegmentedControl;
/* CSS variables from my global config */
:root {
  --boxBg: #f3f3f3;
  --activeBg: #292929;
  --text: #000;
  --shadow: 0 1px 3px rgba(0, 0, 0, 0.1);
}

[data-theme="dark"] {
  --boxBg: #1f1e1d;
  --activeBg: #292929;
  --text: #fff;
}
.list {
  display: inline-flex;
  margin: 0;
  padding: 3px;
  list-style: none;
  background-color: var(--boxBg);
  border-radius: 10px;
}

.item {
  position: relative;
  margin-bottom: 0;
  line-height: 1;

  &:after {
    position: absolute;
    top: 15%;
    right: -0.5px;
    display: block;
    width: 1px;
    height: 70%;
    background-color: var(--border);
    transition: opacity 200ms ease-out;
    content: "";
  }

  &:last-of-type {
    &:after {
      display: none;
    }
  }
}

.itemNoDivider {
  composes: item;

  &:after {
    opacity: 0;
  }
}

.button {
  position: relative;
  margin: 0;
  padding: 7px 30px;
  color: var(--text);
  line-height: 1;
  background: transparent;
  border: none;
  outline: none;

  &:hover,
  &:focus {
    cursor: pointer;
  }
}

.label {
  position: relative;
  z-index: 2;
}

.active {
  position: absolute;
  top: 0;
  right: 0;
  bottom: 0;
  left: 0;
  z-index: 1;
  background-color: var(--inputBg);
  border-radius: 7px;
  box-shadow: var(--shadow);
  content: "";
}
There are a few things happening here so let’s walk it through.
First we make sure our component accepts an array of items as props, then we initialise our state to keep track of which item is selected with react useState.
import { useState } from 'react'

type SegmentedControlProps = {
  items: Array<string>
}

const SegmentedControl = ({ items }: SegmentedControlProps): JSX.Element => {
  const [activeItem, setActiveitem] = useState(0)
  return ()
}
In a real-world use case you might opt to keep track of the active item by the page pathname so that you can link to a specific page, in that case you'd get the current pathname with your respective routing solution and then compare it to your items. For Next.js something like:
/* example.com/two */

import { useRouter } from "next/router";

const { pathname } = useRouter();

const items = ["one", "two", "three"];
{
  items.map((item) => {
    const activeItem = pathname.contains(item);
  });
}
Moving on we wrap our component with AnimateSharedLayout from Framer Motion, it’s a dead simple way of animating between different elements or components. If you’ve used keynote you can think of it like the “Magic Move” transition. In this example we’re using it to animate our active background state when switching items.
We'll map over our items, get the current active tab by comparing the item index to our state, and for each item return a motion.li. Motion components are used to specify how we want our animation to look like by passing props like animate (how the animation will finish), initial (our initial state of the animation), exit (how our animation looks like when the component dismounts) etc. There are also helper props for things like hover and taps like whileHover and whileTap. In this example we're using the whileTap prop for two things depending on if the item is active or not. If it's active, scale the active state down slightly so the user sees that the UI responds otherwise change the opacity slightly.
If showing more than 2 items, we want to show dividers between the items. We can do this in CSS by using an :after psuedo element. That way we don't need to add any extra elements to the original DOM. Let's change classNames for our motion.li depending on if the divider should be visible or not. There are two scenarios where it should not be visible: 1: when the current item is selected and 2: it's the item before the current selected one. This is because we're positioning the divider to the right of each item (right: -0.5px). Our last item does not need any divider so we can remove it with the :last-of-type selector. Let's also add an opacity transition so that the dividers fade smootly when switching items.
return (
  <AnimateSharedLayout>
    <ol className={styles.list}>
      {items.map((item, i) => {
        const isActive = i === activeItem;
        return (
          <motion.li
            className={
              isActive || i === activeItem - 1
                ? styles.itemNoDivider
                : styles.item
            }
            whileTap={isActive ? { scale: 0.95 } : { opacity: 0.6 }}
            key={item}
          >
            …
          </motion.li>
        );
      })}
    </ol>
  </AnimateSharedLayout>
);
.item {
  position: relative;
  margin-bottom: 0;
  line-height: 1;

  &:after {
    position: absolute;
    top: 15%;
    right: -0.5px;
    display: block;
    width: 1px;
    height: 70%;
    background-color: var(--border);
    transition: opacity 200ms ease-out;
    content: "";
  }

  &:last-of-type {
    &:after {
      display: none;
    }
  }
}

.itemNoDivider {
  composes: item; /* css modules syntax, compiles to something like "class="item itemNoDivider" */

  &:after {
    opacity: 0;
  }
}
We'll add a button inside each item in order to change item on click. If the current item is the active item we add a motion.div for rendering the active background styles. This is where we are telling AnimatePresence which element to animate by passing a layoutId. It can be any string but needs to match for all elements that should share the same transition. Let's add some styling to the active div and put our item text inside a span in order to position it above the background div with CSS.
<button
  onClick={() => setActiveitem(i)}
  type="button"
  className={styles.button}
>
  {isActive && (
    <motion.div layoutId="SegmentedControlActive" className={styles.active} />
  )}
  <span className={styles.label}>{item}</span>
</button>
.button {
  position: relative;
  margin: 0;
  padding: 7px 30px;
  color: var(--text);
  line-height: 1;
  background: transparent;
  border: none;
  outline: none;

  &:hover,
  &:focus {
    cursor: pointer;
  }
}

.label {
  position: relative;
  z-index: 2;
}

.active {
  position: absolute;
  top: 0;
  right: 0;
  bottom: 0;
  left: 0;
  z-index: 1;
  background-color: var(--activeBg);
  border-radius: 7px;
  box-shadow: var(--shadow);
  content: "";
}
When clicking to change items our background will now animate magically 🪄. If you try to click the same item that's already active it will scale down slightly. If there are more than 2 items, we'll have dividers between the items that are not siblings to the active one. When switching items the dividers will fade smoothly.
Our complete component
The full source code is available on my GitHub.
Creating transitions is super fun with Framer Motion and I am especially excited for the possibilities around AnimatedSharedLayout. It makes it extremely easy to create fluid interfaces and I'll be showing more examples of this in the future!
If this helped press the ❤️ below or let me know on Twitter


